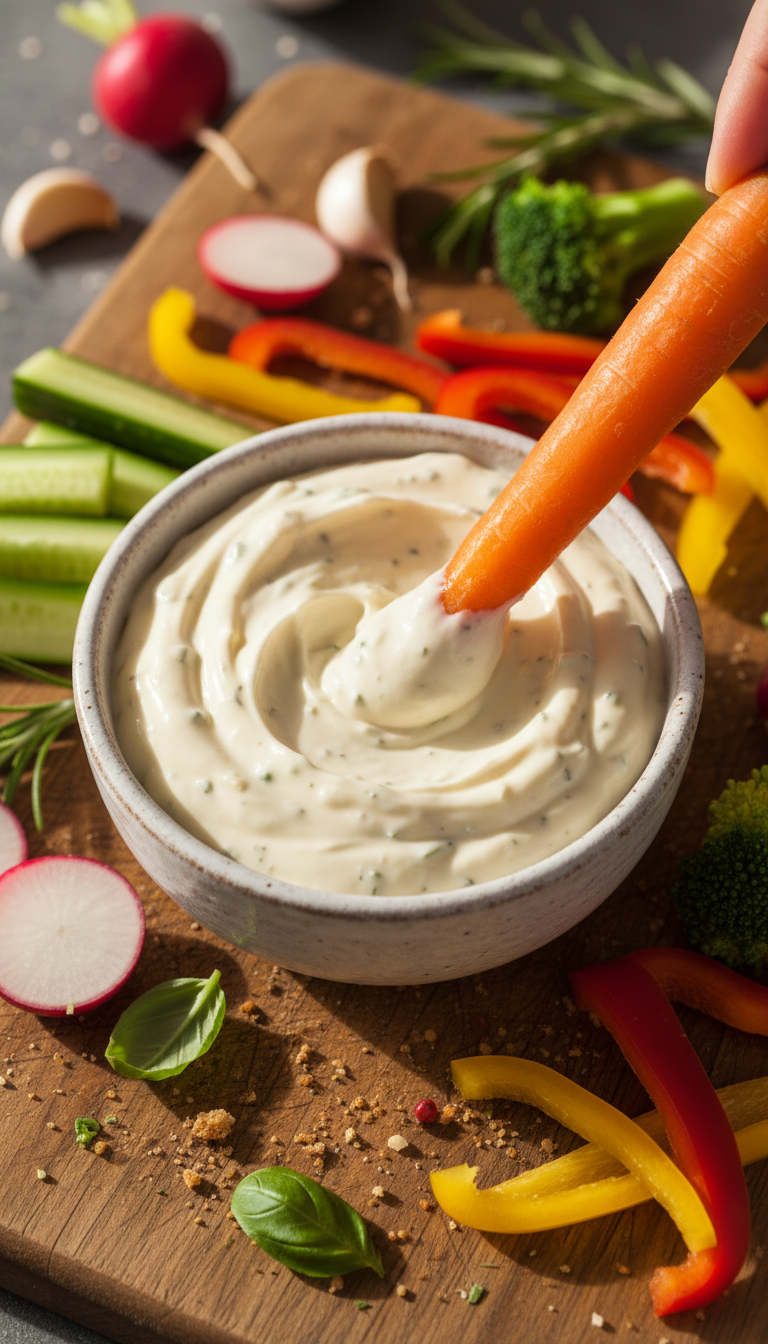
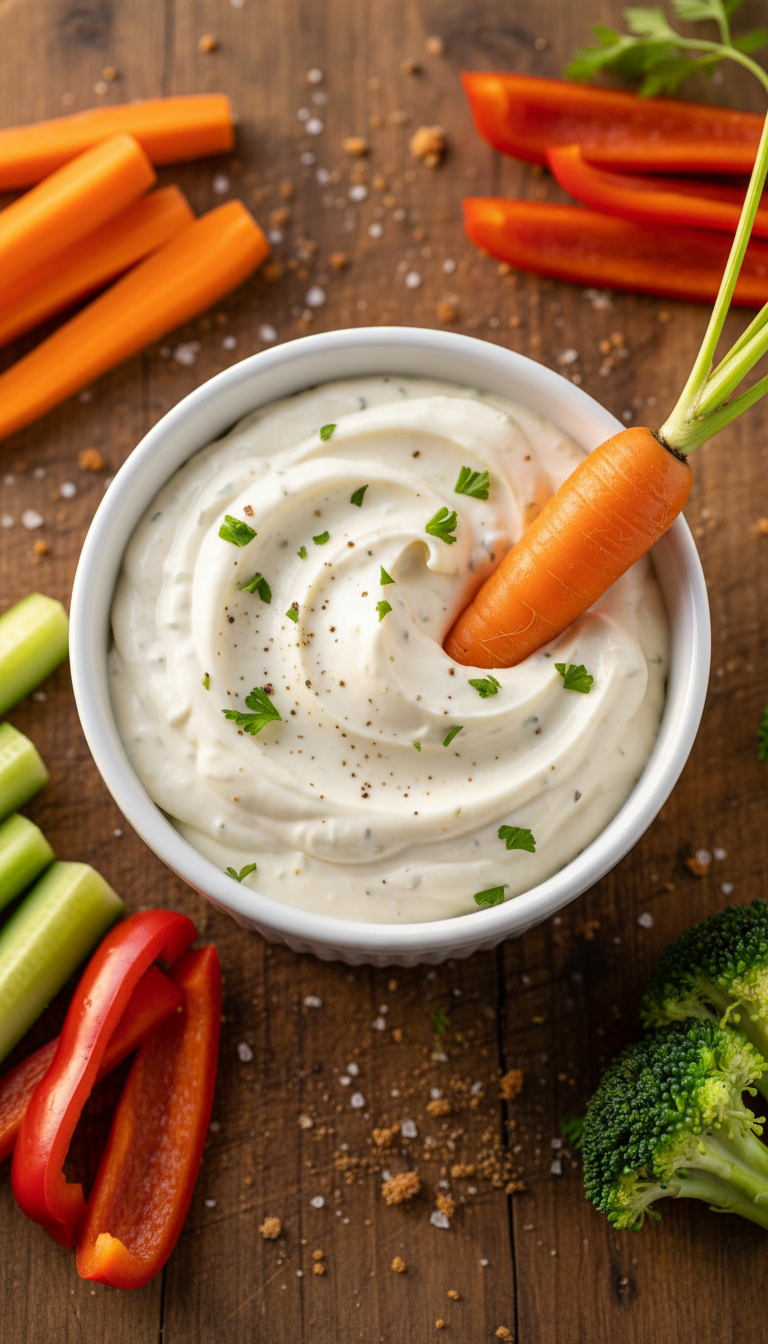
Garlic Aioli for Dipping Veggies
Highlighted under: Wholesome & Clean Eating
I absolutely love making garlic aioli for dipping my favorite veggies. This creamy, zesty sauce elevates even the simplest of snacks into something truly special. When I discovered that whipping up this delightful dip only takes about 10 minutes, I couldn't believe how easy it was! The combination of fresh garlic and tangy lemon makes it a refreshing contrast to crunchy vegetables. Whether it's for a gathering or a quick afternoon snack, this aioli is sure to be a crowd-pleaser!
When I first made garlic aioli, I was surprised at how a few simple ingredients could create such an incredible flavor. The key is using high-quality olive oil and fresh garlic. I tried storing leftovers in the fridge for later use, and I found that the flavors actually improved overnight, making it an ideal make-ahead treat!
One of my favorite tips is to add a pinch of cayenne pepper for a subtle kick, which really transforms the aioli. Since this recipe can easily be doubled, it's perfect for parties or bulk meal prep. Trust me, once you try it, you'll want to dip everything in this aioli!
Why You'll Love This Recipe
- Creamy texture that pairs perfectly with crunchy vegetables
- Simple ingredients come together for a burst of flavor
- Quick to whip up, making it perfect for last-minute snacks or gatherings
Perfecting Your Aioli
Creating a smooth and creamy aioli hinges on how well you mix the ingredients. I recommend using a whisk or handheld mixer to combine the mayonnaise and other components effectively, ensuring there are no lumps. Whisk until the mixture is completely smooth and glossy—this should take about 1-2 minutes. A well-mixed aioli will not only look appealing but will also blend flavors uniformly, enhancing the taste when paired with your veggies.
The garlic in this aioli is the star ingredient, and its freshness is paramount. Opt for freshly minced garlic rather than pre-minced or powdered forms for the best flavor. Additionally, letting the aioli sit for about 10 minutes after mixing allows the flavors to mingle and develop further. This resting time also helps mellow the raw garlic's sharpness, making it more palatable.
Customizing Your Aioli
One of the best aspects of this aioli is how easily it can be tailored to suit your preferences. If you're a fan of herbs, consider adding freshly chopped parsley or dill for a burst of color and flavor. Alternatively, for a smoky twist, a dash of smoked paprika can transform the aioli into a zesty complement to grilled vegetables. Feel free to experiment with different mustard varieties, such as whole grain or spicy brown, to find your ideal flavor profile.
For those avoiding eggs or soy, a vegan mayonnaise can serve as an excellent substitute, allowing everyone to enjoy this classic dip. Just be cautious with the seasonings, as many store-bought vegan mayonnaises have varying levels of flavor. Start with the base ingredients, taste as you go, and adjust the salt and garlic accordingly to suit your palate.
Ingredients
Gather the following ingredients:
Ingredients
- 1 cup mayonnaise
- 2-3 cloves garlic, minced
- 1 tablespoon lemon juice
- 1 teaspoon Dijon mustard
- Salt and pepper to taste
- Optional: pinch of cayenne pepper
Mix and enjoy!
Instructions
Follow these easy steps to make your aioli:
Combine Ingredients
In a medium bowl, combine the mayonnaise, minced garlic, lemon juice, and Dijon mustard. Mix well until smooth.
Season to Taste
Add salt and pepper to your liking. For a little extra heat, stir in a pinch of cayenne pepper.
Serve
Transfer your garlic aioli to a serving bowl and enjoy it with fresh vegetable sticks, crackers, or as a sandwich spread.
Serve and savor the deliciousness!
Pro Tips
- Feel free to customize your aioli by adding herbs like parsley or basil for a fresh twist.
Storage Tips
This garlic aioli can be made ahead of time and stored in the refrigerator, making it an excellent option for meal prep. Transfer the aioli to an airtight container and refrigerate for up to one week. As it sits, the flavors will continue to develop, offering an even more robust taste. Just remember to give it a good stir before serving, as separation may occur over time.
If you want to make a larger batch for a gathering, be aware that the aioli may thicken as it cools in the fridge. If this happens, simply whisk in a tiny bit of water or additional lemon juice to reach your desired consistency before serving.
Serving Suggestions
While fresh vegetable sticks are a classic pairing, this garlic aioli can elevate a variety of dishes. Use it as a spread for sandwiches or wrap it in tortillas for added creaminess and flavor. It also makes a delightful dip for crispy potato wedges or as a sauce for grilled chicken or seafood—its versatility knows no bounds.
Don't shy away from pairing it with seasonal produce! As the seasons change, introduce different veggies like roasted eggplant, zucchini, or bell peppers for dipping. Grilled shrimp or mild fish can also benefit from this zesty aioli, as it complements their flavors beautifully while providing a creamy texture contrast.
Questions About Recipes
→ How long can I store garlic aioli?
Garlic aioli can be stored in an airtight container in the refrigerator for up to one week.
→ Can I use a different type of oil?
Yes, you can use avocado oil or a light olive oil if you prefer. Just avoid highly flavored oils.
→ Is this aioli vegan?
Traditional aioli uses eggs, but you can substitute the mayonnaise with a vegan version to make this dip vegan.
→ What can I use garlic aioli with?
Garlic aioli is fantastic with raw veggies, fries, sandwiches, or even as a dressing for salads.
Garlic Aioli for Dipping Veggies
Created by: The Recipesbyleo Team
Recipe Type: Wholesome & Clean Eating
Skill Level: Beginner
Final Quantity: Serves 4
What You'll Need
Ingredients
- 1 cup mayonnaise
- 2-3 cloves garlic, minced
- 1 tablespoon lemon juice
- 1 teaspoon Dijon mustard
- Salt and pepper to taste
- Optional: pinch of cayenne pepper
How-To Steps
In a medium bowl, combine the mayonnaise, minced garlic, lemon juice, and Dijon mustard. Mix well until smooth.
Add salt and pepper to your liking. For a little extra heat, stir in a pinch of cayenne pepper.
Transfer your garlic aioli to a serving bowl and enjoy it with fresh vegetable sticks, crackers, or as a sandwich spread.
Extra Tips
- Feel free to customize your aioli by adding herbs like parsley or basil for a fresh twist.
Nutritional Breakdown (Per Serving)
- Calories: 150 kcal
- Total Fat: 15g
- Saturated Fat: 2g
- Cholesterol: 5mg
- Sodium: 210mg
- Total Carbohydrates: 2g
- Dietary Fiber: 0g
- Sugars: 0g
- Protein: 1g